
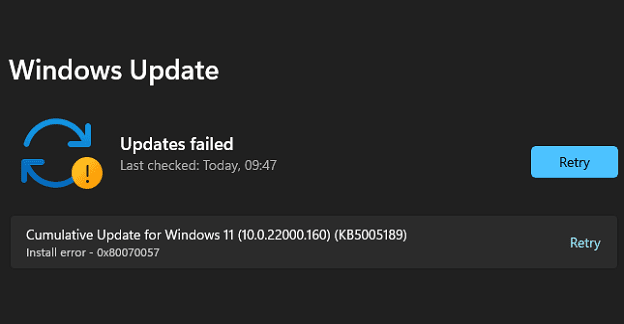
Windows 11 may sometimes throw up error code 0x80070057 when you try to install the latest updates. This error indicates your computer failed to install the updates. If you have already restarted your machine, but the error persists, follow the troubleshooting solutions below.
How to Fix Windows 11 Error 0x80070057
Run the Update Troubleshooter
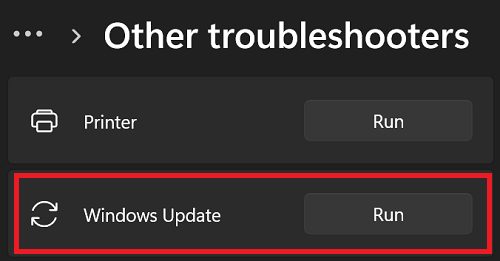
Run the built-in Windows Update troubleshooter and check if the tool helps you get rid of error 0x80070057.
- Go to Settings.
- Select System.
- Click on Troubleshoot.
- Go to Other troubleshooters.
- Launch the Update troubleshooter.

- Check for updates again.
If the error persists, switch to a cable connection. If you can’t do that, unplug your router, and leave it unplugged for one minute. Then plug it back in, wait until your computer goes back online, and check for updates again.
Restart the Update Services
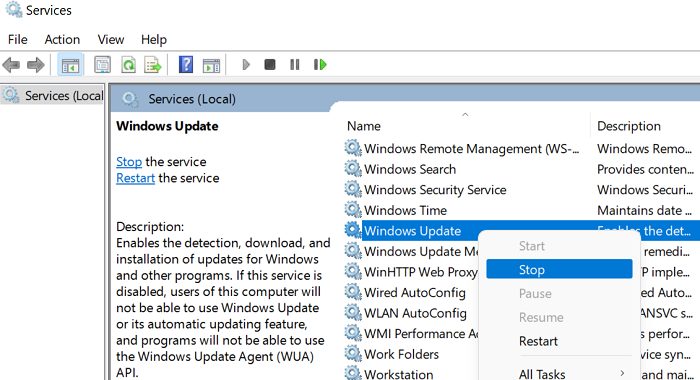
- Press the Windows and R keys to open a new Run window.
- Type services.msc and hit Enter.
- Stop the following services: Windows Update, Background intelligent transfer, and the Cryptographic service.

- Then, go to C:\Windows\System32\Catroot2.
- Rename the Catroot2 folder to Catroot2.old.
- Go to C:\Windows\SoftwareDistribution.

- Delete all the files inside the SoftwareDistribution folder but keep the folder.
- Open the Services app again.
- Restart the Windows Update, Background intelligent transfer, and Cryptographic services.
- Set the Startup type to Automatic for all these services.
- Restart your computer and check for updates again.

Clean Boot Your Computer
Unplug all the external devices connected to your computer. Then clean boot your system, and check for updates again. As a quick reminder, by performing a clean boot, you start your device with a minimum set of processes and drivers. In this manner, nothing’s interfering with the Windows Update services.
Make Sure Date and Time Settings Are Correct
If your date and time settings are incorrect, your computer won’t connect to the Windows Update servers.
- Right-click on the Taskbar and select Adjust date and time.
- Toggle on the following options:
- Set time automatically
- Set time zone automatically

- Try rerunning the Windows update.

Repair Your Drive and Free up Some Space
Corrupted or faulty system files may also trigger error 0x80070057. The same is valid if there’s not enough free space on your drive.
Go to This PC, and select your OS drive. Delete unnecessary programs and files to free up some space. Keep in mind that you need at least 64GB of free storage to install Windows 11. You need additional storage space to download updates and enable specific features.
After freeing up some space, check your OS drive for system errors.
- Go to This PC.
- Right-click on your OS drive.
- Select Properties.
- Click on the Tools tab.
- Then hit the Check button.

- After that, launch Command Prompt with admin rights.
- Run the following commands and hit Enter after each one:
- DISM.exe /Online /Cleanup-image /Restorehealth
- sfc /scannow
- Try rerunning the Windows update.

Conclusion
To fix Windows 11 error 0x80070057, run the Update troubleshooter. Then restart the Windows Update services and rename the Software Distribution folder. Additionally, clean boot your computer and make sure your date and time settings are correct. If the issue persists, repair your drive and free up some space.
Did these solutions help you fix error code 0x80070057? Which method did the trick for you? Let us know in the comments below.



Windows 11 error 0x80070057 has nothing to do with Windows update, I also got it but when starting Hyper V virtual disk, (Hyper-V cannot start the worker process, one or more arguments are invalid, error code 0x80070057) https://learn.microsoft.com/en-us/troubleshoot/windows-server/virtualization/hyper-v-virtual-machine-doesnt-start
1. There is nothing wrong with my Update only with Hyper V that it does not work and the order of the cmd commands are also wrong first you start with sfc /scannow and if there are errors and are not solved then do the command DISM.exe /Online /Cleanup-image /Restorehealth
So I don’t understand what you’re trying to fix here
No, and having to search what Microsoft error codes means and then trying a bunch of crap doesn’t give a wonderful user experience.
Did this help? Absolutely NOT! Error 0x80070057 has been thrown on my machine for every automatic update for nearly 5 years on Windows 10 and then Windows 11. Error 0x80070057 occurs almost immediately on doing update. I’ve tried every internet suggestion multiple times over multiple years, different hardware – no success.
I can only update manually.