Having cache on your computer is a good thing. Thanks to it, your computer can give you a faster experience. But if you don’t clean it every once in a while, it can cause apps to malfunction. This happens when the cache you don’t clear becomes corrupted. So, by clearing it, you’ll help improve your computer’s performance.
How to Clear the Cache on Your Windows 11 Computer
By clearing the cache, you’ll always be using the latest version, and there’s also no need to be afraid of removing it. After a little while, the sites you visit and the apps you use will re-cache the data on your computer again. But, if you think it’s time to clear the cache on your Windows 11 computer, follow these steps.
The good news is that you won’t have to install another app. You can use Disk Cleanup to clean that unwanted cache. Go to the search tool and look for Disk Cleanup.

When the Disk Cleaner window appears, click on the Cleanup system files at the bottom left. Don’t be afraid if the window disappears and reappears. This just means that it collected more files for you to erase. Now, check the boxes for the files you want to erase and click on OK. You’ll see a pop-up message asking you if you’re sure that you want to erase the files. If you haven’t changed your mind, click on the Delete files button.

Quick Tips on Clearing Cache
If you’re having problems with the Windows Store, you can clear the cache for a fresh start by opening the Run box and entering wsreset.exe, don’t forget to press Enter. A blank box will appear and disappear. This means the process was done correctly.

Clean the DNS Cache
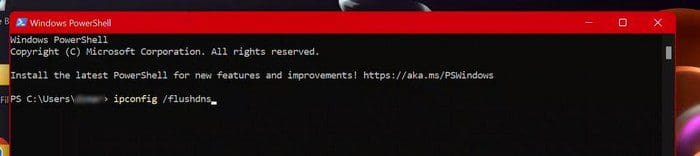
Don’t forget about cleaning the DNS cache. You can do this by searching for and opening the Windows terminal. Once it’s open, type ipconfig /flushdns.
Clear Cache for Microsoft Edge
Clearing the cache from Edge is also a good idea. You can do this by opening the browser and going to Settings. Click on the Privacy and Services option on the left. Click on the blue Choose What to Clear button. When the Clear browsing data window appears, make sure to check the boxes for what you want to clear.

Also, don’t forget to choose the time range at the top. If you want to start fresh, choose the All-time option from the dropdown menu. You can also clear it every time you stop using the browser. Under the Clear browsing data section, click on the option that says Choose what to clear every time you close the browser. You’ll see various options you can choose from. Simply toggle on the option you want to be erased every time you’re going to close the browser.
Erase Cache and Storage Sense
Suppose your location cache is something you can live without. In that case, you can erase it by going to Settings > Privacy and security > Location.

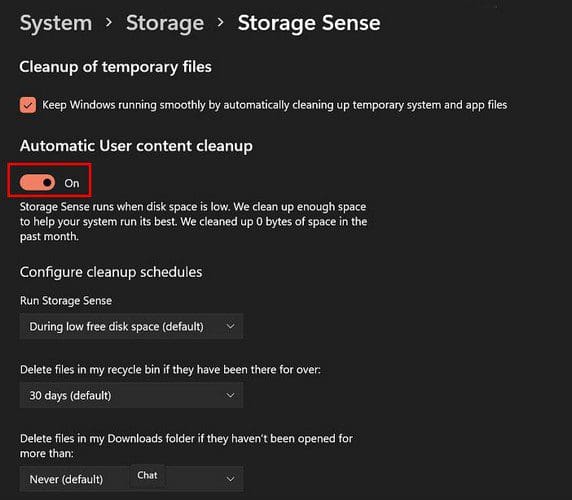
With Storage Sense, you can have the cache rased after a specific amount of time. Click on the dropdown menu for the options listed and choose the time. Make sure the on button is toggled on for the selected options to apply.
That’s all there is to it. By clearing the cache, you get rid of outdated data and always work with the latest information.
Conclusion
If you start experiencing app problems, clearing the cache on your Windows 11 computer might do the trick. As you can see, there are various options you can choose from. Which option do you think you’re going to go with first? Share your thoughts in the comments below, and don’t forget to share the article with others on social media.