You never know when disaster could strike, and your Windows installation gets corrupted or infected with a virus. It’s rare, but it can happen. A Windows Recovery Disk is exactly the resource you would want to have around in this sort of scenario – a way to get back to when things worked. These disks contain a number of tools to help troubleshoot problems, and in a worst-case scenario to reset Windows to default. It’s always good to have one around just in case you need it later – better safe than sorry.
The process requires an external storage drive, such as a USB stick, that is at least 16GB in capacity. It will be wiped in the process, so ensure any data on the USB stick is backed up before beginning. In other words – make sure the USB stick is empty and ready to go.
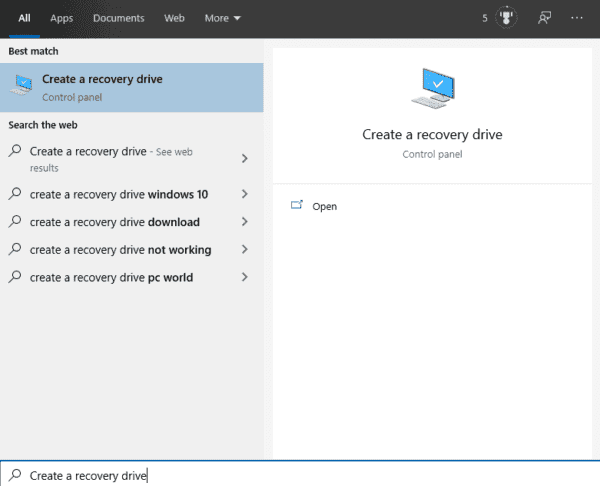
Creating the Recovery Disk is actually a fairly simple process. Once your 16GB USB stick is plugged in, open the start menu by pressing the Windows key. Type “Create a recovery drive” and press enter.
At this point, you may see a “User Account Control” prompt asking to verify that you want this program to be able to make changes to your device. Don’t worry, these prompts are a common security precaution for programs that require administrative permissions. It’s the computer’s way of checking you’re sure you want to do this and know it’s happening. Click “Yes” to continue.

The first screen of the Recovery Drive creation process has a checkbox to confirm that you want to “Back up system files to the recovery drive.” You should leave this box ticked. It copies across the files that are necessary for the recovery drive to be able to reinstall Windows, should it come to that. Click Next to proceed.
Tip: If you unselect this option, you could use a USB stick that is only 1GB, but you would only have the troubleshooting tools and would be unable to use it to reinstall Windows if you needed to perform a full reset. It’s highly recommended that you go with the full option – you never know when you may need them!

The program will now search for available drives. This may take a few minutes. Once the process is complete a list of removable drives will be shown. Select the drive you want to use and click Next. It helps if you give your drive a different name – something easy to recognise, like ‘RecoveryUSB’ for example. You can rename your drive in your file manager – simply open a file manager window, right-click on the drive you want to name, select the rename option, and call it whatever you’d like!

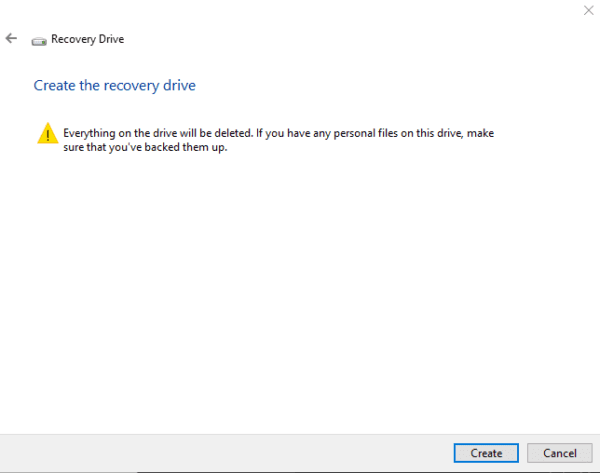
The last screen is a final confirmation that the drive will be wiped in the process. Once you’ve backed up any files you want to keep, press “Create”. After this step, anything that was on the USB drive before will be gone.
This process can take some time to complete, so feel free to do something else while you wait. Once the process is complete, the progress bar will be replaced with the text “The recovery drive is ready”. Click “Finish” to complete the process.
Tip: Remember to store your recovery drive in a safe and memorable place so you can find it again, in the hopefully unlikely event that you should need it.