Skip to content
LogoTechnipages
technipages logo
  • Topics
        • Android
        • Browsers
        • Gaming
        • Hardware
        • Internet
        • iPhone
        • Linux
        • macOS
        • Office
        • Reviews
        • Software
        • Windows
        • Definitions
  • Product Reviews
  • Downloads
  • About

VR Oculus Quest 2: How to Take and Share a Screenshot

Mel HawthorneMarch 28, 2021 Comments (1)
Oculus

Select where you want to share the screenshot. Occasionally, when using a computer, you may want to share a copy of what’s on your screen. To do so, you want to take a screenshot. Screenshots are great for showing most things that are on your screen.

For example, if you just got a new high score in-game, you can share your new record with your friends. Similarly, If you’re partway through a piece of digital art and want to quickly share an in-progress shot, a screenshot also works well.

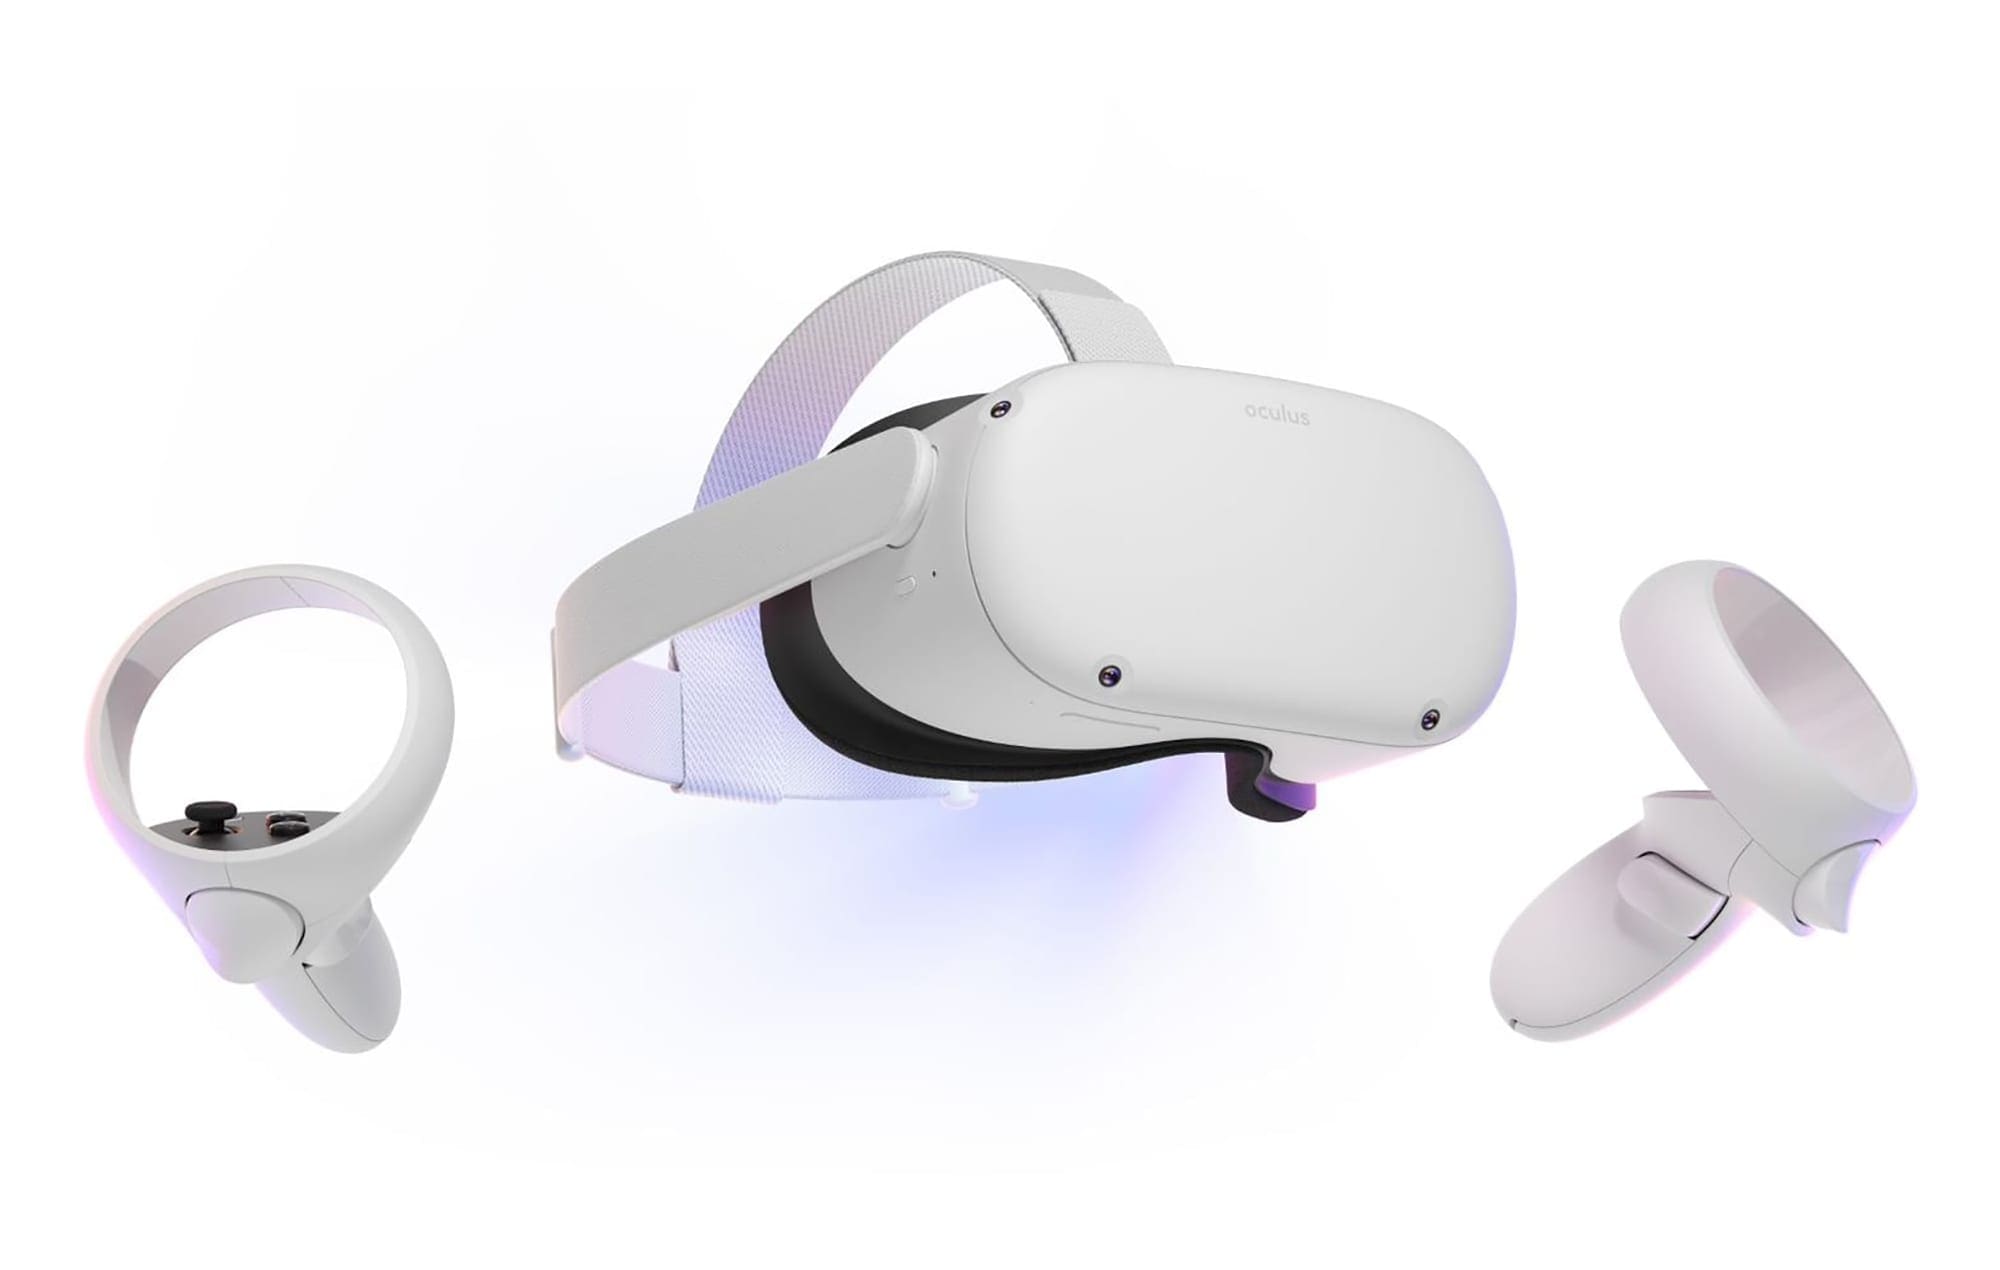
Screenshots are also a good way to share things in virtual reality. As with everywhere else, they work great to show off your new high score or to show off a cool environment. That all requires you to know how to take and share screenshots; however, Oculus Quest 2 doesn’t have a screenshot button.

Thankfully, taking screenshots is actually quick and simple, thanks to an undocumented shortcut. To take a screenshot, press and hold the Oculus button on the right controller, then press the trigger on either controller. Once you’ve done so, an audio notification will play, and a small popup will appear to confirm you’ve taken a screenshot.

How to Share a Screenshot

Taking a screenshot is all well and good, but to show it to other people, you need to be able to share it too. With Oculus being owned by Facebook, that is the only platform you can share screenshots too. To do so, press the Oculus button to open the menu; next, click on the sharing icon, then either select which of your five most recent screenshots you want to share or click “View All.”
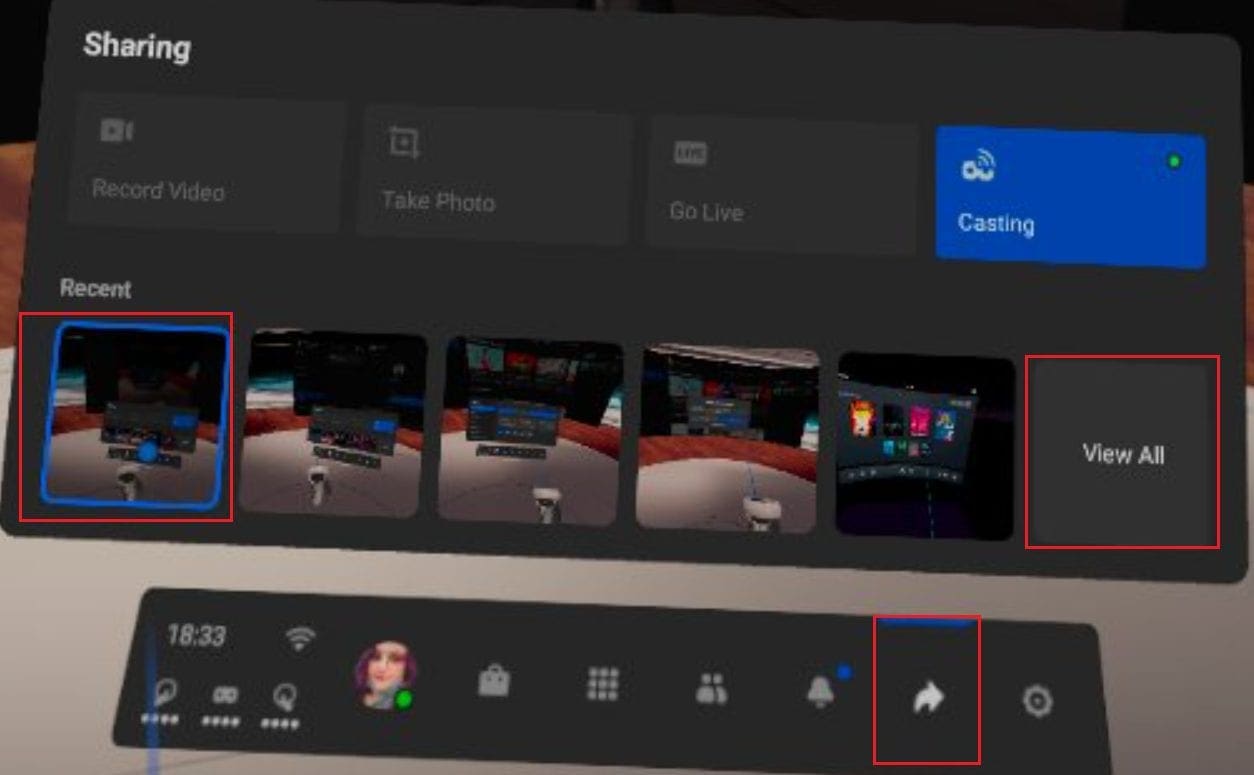
Open the Oculus menu, then open the screenshot you want to share from the sharing menu.

When viewing the screenshot, click the Share icon in the top-right corner to open the sharing options.

Click the Share icon in the top-right corner of the screenshot to open the sharing options.

You can choose to share to your Facebook feed, to a Facebook group, or through Facebook Messenger in the sharing options. Recently used options will also appear at the top of the page as a shortcut. Simply select where you want to share the screenshot, and it will be instantly shared.

Tip: There’s no confirmation dialogue if you misclick, so be careful to select the right option the first time.
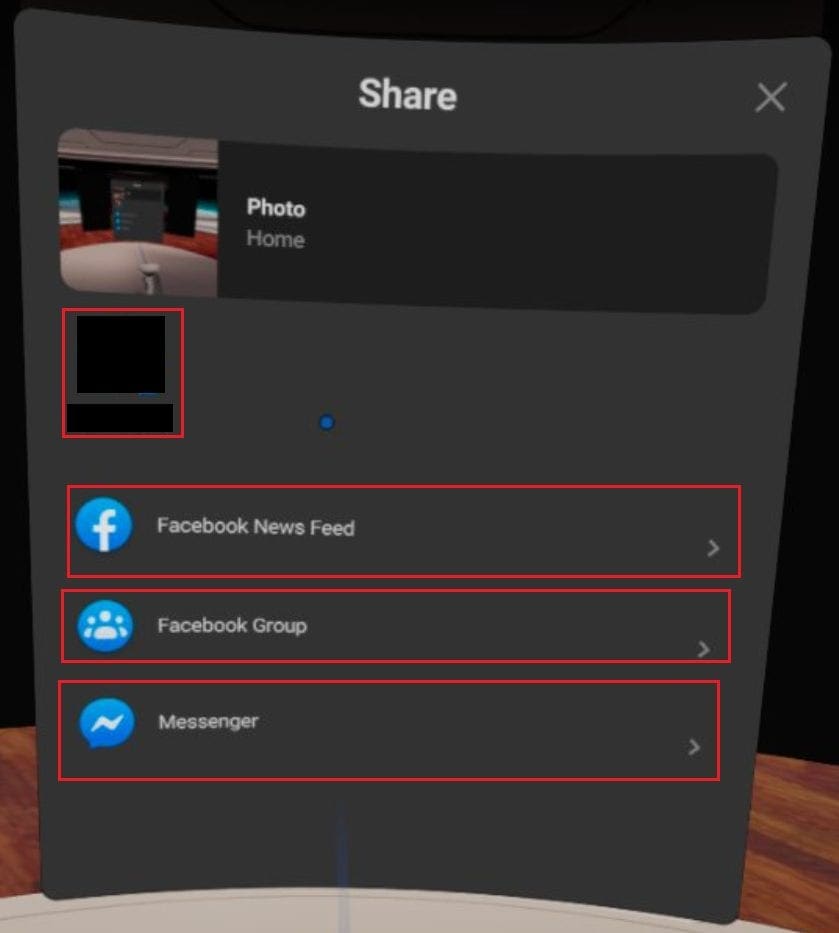
Select where you want to share the screenshot.

Sharing a screenshot is a great way to show off something cool. By following this guide’s steps, you can take and share screenshots from the Quest 2 VR headset.

Categories: Gaming | Hardware

Author Mel Hawthorne

You Might Also Like

  • What is Field of View?

    Mel HawthorneGaming
  • Razer Synapse 3.0: How to Rebind a Key

    Mel HawthorneGaming
  • Oculus

    VR Oculus Quest 2: What Is A Guardian Boundary?

    Mel HawthorneGaming
  • PS5 NVMe Requirements You Must Fulfill to Expand PS5 Storage

    Martin ClarkGaming

Comments

  1. dylan says:
    June 1, 2022 at 7:41 pm

    no, you didnt show how to get that bar, that bar is nmot anywhere on my oculus quest 2

Leave a Reply

Your email address will not be published. Required fields are marked *

This site uses Akismet to reduce spam. Learn how your comment data is processed.

300x600
Turning on Triple Touch Zoom on Android

Turning on Triple Touch Zoom on Android

How to Connect Outlook 2023 to Gmail

How to Connect Outlook 2023 to Gmail

Netflix: Change Password

Netflix: Change Password

Everything You Need to Know About WhatsApp Delete for Me

Step-by-Step Guide: How to Use WhatsApp on Your Computer

Android: Enable or Disable Background Data

Android: Enable or Disable Background Data

300x250
profile pic

The Experts Behind Technipages

My name is Mitch Bartlett. I've been working in technology for over 20 years in a wide range of tech jobs from Tech Support to Software Testing. I started this site as a technical guide for myself and it has grown into what I hope is a useful reference for all.

Learn More

300x250 2
technipages logo white
linkedin icon

Technipages is part of Guiding Tech Media, a leading digital media publisher focused on helping people figure out technology. Visit guidingtechmedia.com to learn more about our mission and team.

© 2026 Guiding Tech Media All Rights Reserved

  • About Us
  • Contact
  • Legal & Privacy

© 2026 Guiding Tech Media All Rights Reserved

Information from your device can be used to personalize your ad experience.
Do not sell my personal information.