Navigating the internet often feels like a voyage into the boundless ocean of knowledge, with your favorite websites and webpages serving as familiar islands. Thankfully, Google Chrome provides a nifty feature in the form of bookmarks that help you keep track of these digital islands. However, when it comes to moving to a new device or simply backing up your bookmarks, exporting these bookmarks becomes crucial. Here’s an in-depth guide on how you can export your Google Chrome bookmarks.
How to Export Chrome Bookmarks
Before we embark on this journey, ensure that you’ve signed in to Google Chrome with your Google account. This is essential if you want all your synced bookmarks included in the export. Now, let’s delve into the process:
- Open Google Chrome on your device. You’ll find the Chrome icon in your device’s app drawer, on your desktop, or in your taskbar.
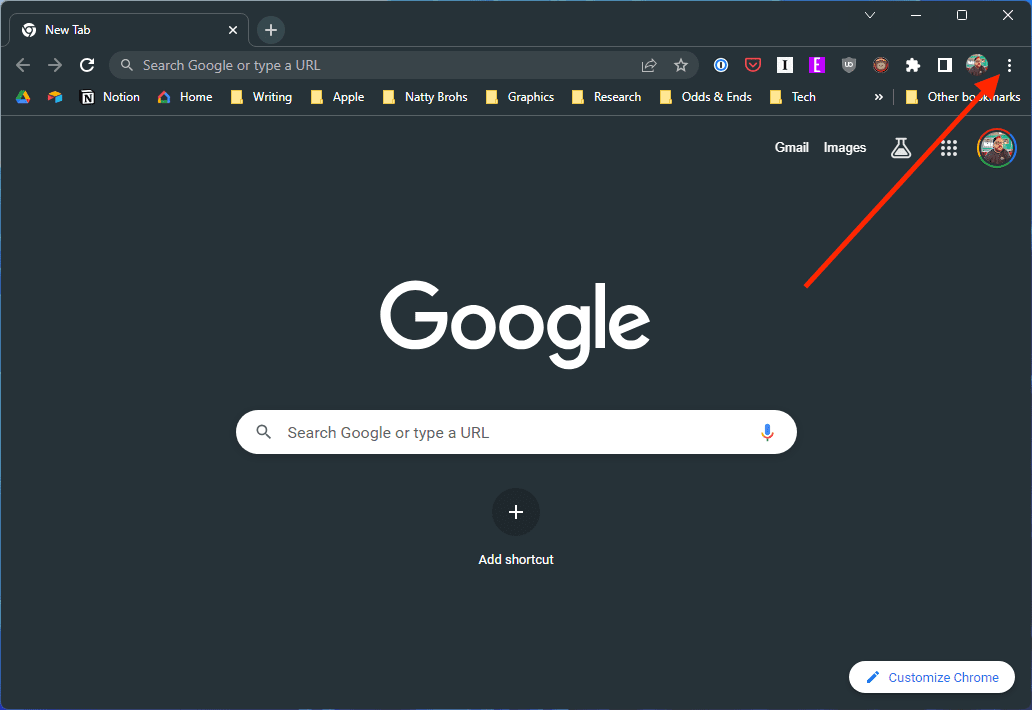
- Once you’ve launched Chrome, look towards the top right of the screen and click on the Three Dots. This is Chrome’s menu icon.

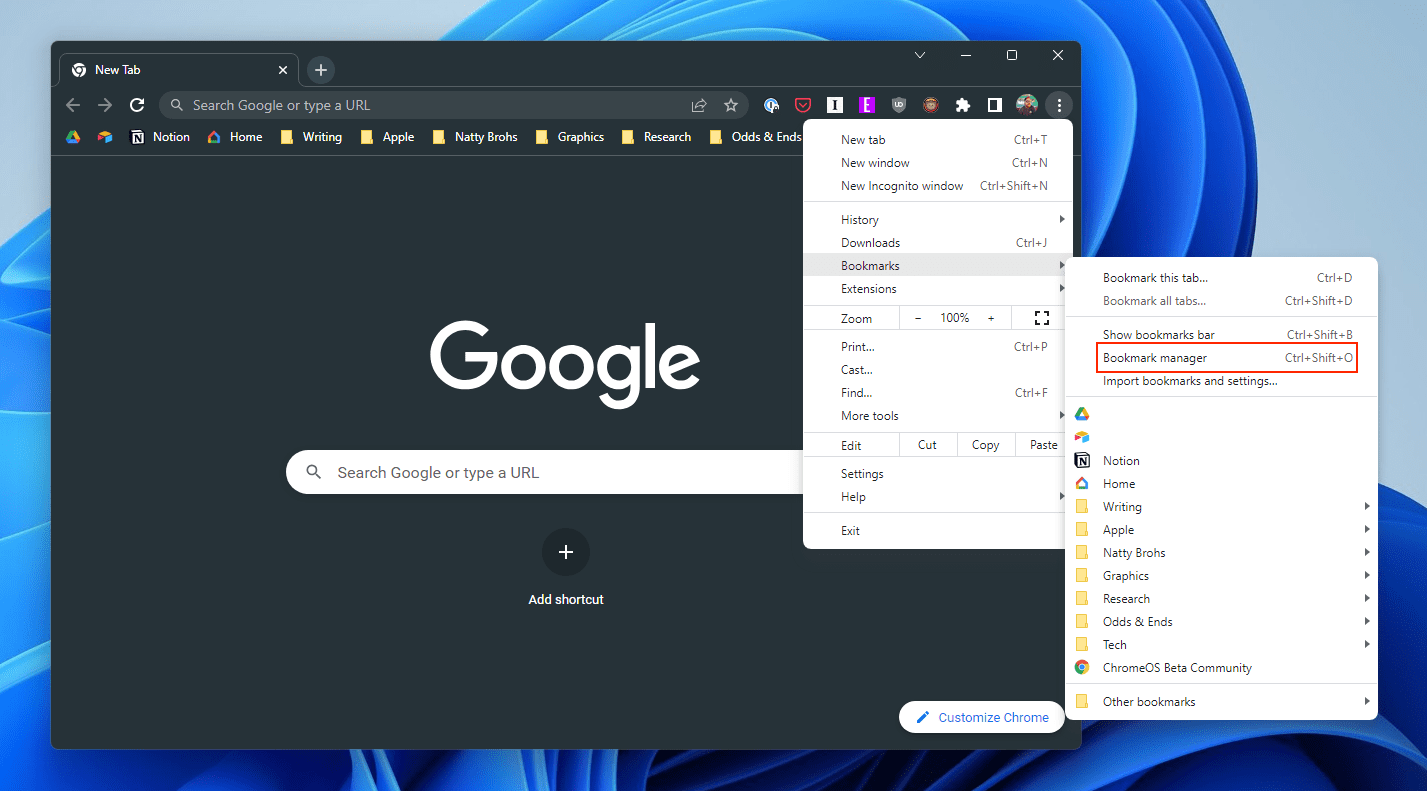
- A drop-down menu will appear. Here, hover over the Bookmarks option. This opens a side menu.
- In the side menu, click on Bookmark Manager. This will take you to a new page where you can manage all your bookmarks.

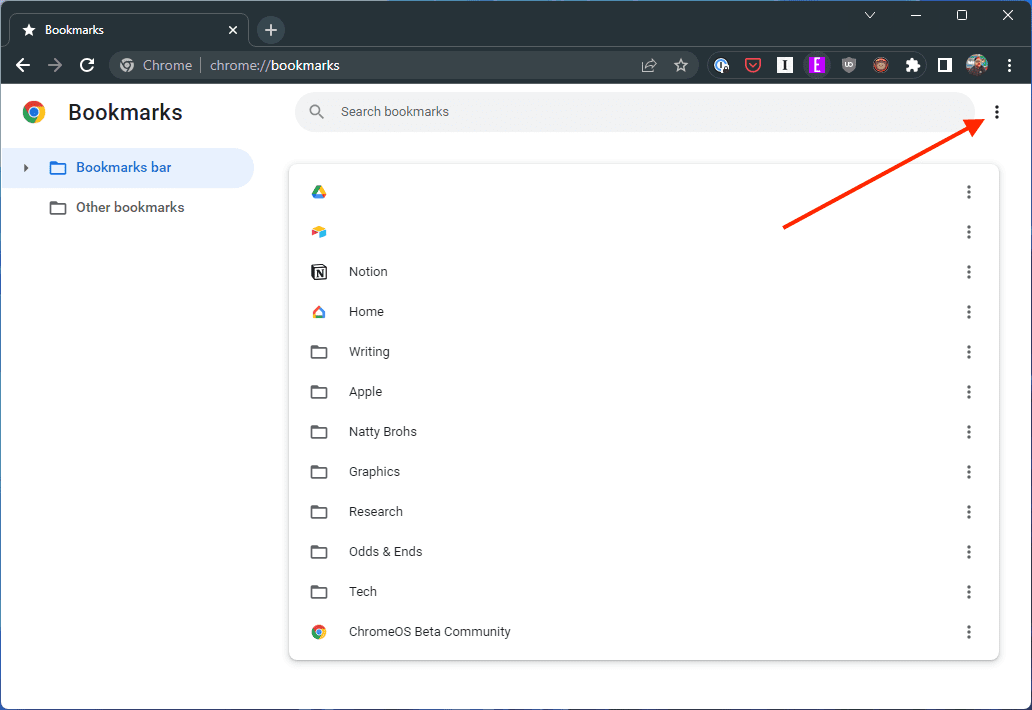
- In the Bookmark Manager, you’ll see another Three Dots icon on the top right of the screen. Click on it to open another menu.
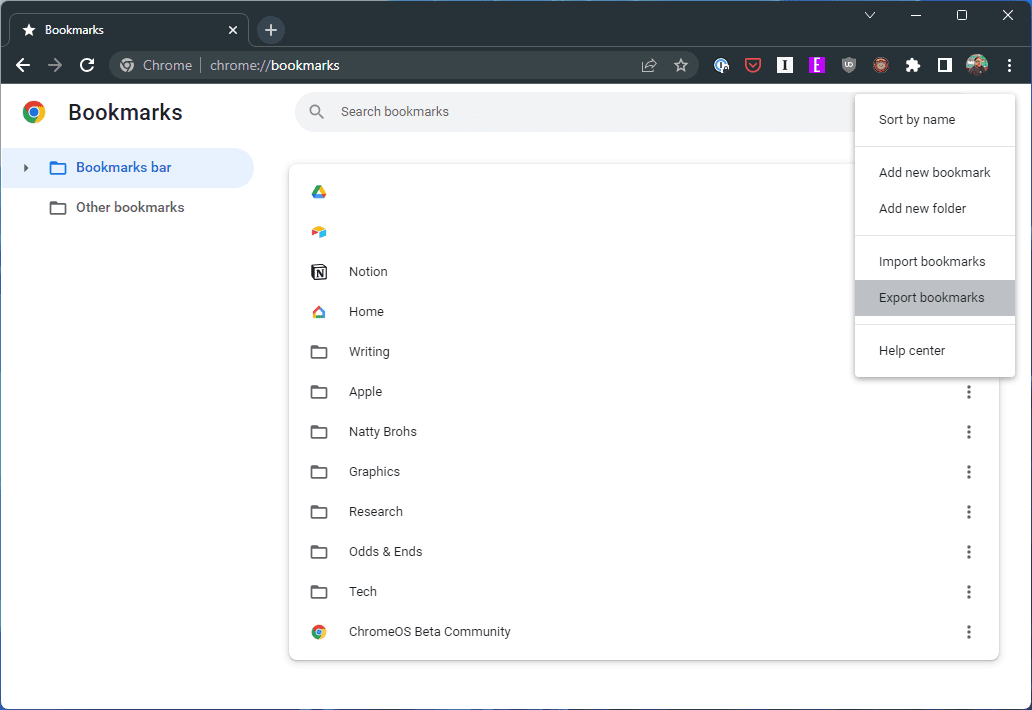
- In this menu, you’ll find the Export bookmarks option. Click on it.

The steps listed above work for those who are trying to export Chrome bookmarks from a Windows computer. However, if you want to export Chrome bookmarks from a Mac, the steps vary just slightly.
- Open Google Chrome on your Mac.
- Make sure you are signed into the account with the bookmarks that you want to export.
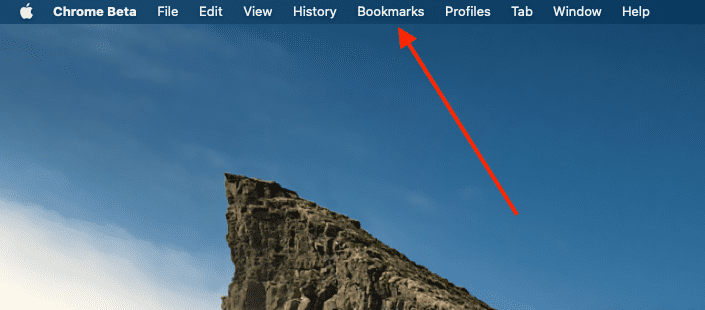
- With Chrome open and set as the “focus” window (you will see “Chrome” in the top left corner), click the Bookmarks button in the Menu Bar.

- From the drop-down menu that appears, highlight and select Bookmark Manager.

- In the top right corner of the Bookmark Manager window, click the three vertical dots.

- Another drop-down window will appear, highlight and select Export bookmarks.


Upon clicking “Export bookmarks,” a save file dialogue box will appear, prompting you to select a location to save the exported bookmark file.
- Choose your desired location, be it a specific folder on your local storage or an external storage device.
- After selecting a location, click on Save.

Congratulations! You’ve successfully exported your Google Chrome bookmarks. The bookmarks are saved in an HTML file, which you can import into Chrome or any other browser on any device.
Conclusion
Keeping your digital space organized is as important as maintaining order in your physical world. Regularly managing, backing up, and if necessary, exporting your bookmarks helps maintain this organization. This not only safeguards your valuable information but also ensures that you always have access to your favorite corners of the web, regardless of the device you’re using. Remember, a well-curated bookmark list is a treasure trove in the world of web browsing.