

The main role of a password manager is to save your login information and automatically auto-fill it whenever necessary. In this manner, you don’t have to manually enter your username and password every time you want to log into various tools and platforms. But sometimes, your password manager may fail to fill in the username and password fields automatically, and Bitwarden is no exception. Let’s explore how you can troubleshoot this problem.
How to Fix Bitwarden Auto Filling Issues
→ Quick Note: If you’re using multiple password managers (which we don’t recommend), disable them and make sure Bitwarden is the only password manager active on your device.
Fix Bitwarden Not Auto Filling on Chrome
Two Workarounds to Manually Trigger Auto Filling
First, make sure your Bitwarden extension is unlocked; otherwise, the auto-fill option won’t work. Go to More tools, select Extensions, and enable Bitwarden.

You can manually trigger the auto-fill function by right-clicking the username or password field and selecting Bitwarden → Auto-fill. Then hit the Login button. Just make sure your Vault is unlocked; otherwise, you can’t call the auto-fill function.
Alternatively, you can also use the auto-fill keyboard shortcut to work your way around this issue. If you haven’t configured the auto-fill shortcuts yet, go to chrome://extensions/shortcuts and set up your shortcuts. Then use it to trigger the auto-fill function.

⇒ Quick Tip: You can also enable the Auto-fill on page load option that automatically auto-fills your login information when a webpage with a login form loads in your browser.
Go to your Bitwarden extension, select Settings, click on Options, and then Enable Auto-fill On Page Load.

Clear the Cache, Cookies, and Update Chrome
Make sure your Chrome browser is working properly. Clear your browsing cache and cookies, check for updates and restart the browser. If the issue persists, uninstall and reinstall Chrome or switch to a different browser.
Fix Bitwarden Not Auto Filling on iOS
If Bitwarden auto-fill is not working on iOS, check if the Vault Timeout Action is set to Log Out. Additionally, check if your two-step login settings require NFC. If this is the case, set your Vault Timeout Action to Lock, or use a different two-step login method.
Then go to your iOS settings, select Passwords, tap AutoFill Passwords and make sure the option is enabled for Bitwarden.

Then check if there’s a newer Bitwarden app version available for your iPhone and install it on your device. Restart your phone and check the results. Do the same for your iOS version.
Fix Bitwarden Not Auto Filling on Android
Enable Dropzone and Floating Windows
If the Bitwarden Auto-fill overlay doesn’t appear on your phone’s screen, make sure the Dropzone and Floating Windows features are enabled.
So, if you own a Huawei or Honor phone, launch the Phone Manager and enable Dropzone. For Oppo and other devices, go to Android Settings, go to Privacy/Security, tap Floating Windows or App Management, and enable Floating windows. Then, go to Bitwarden’s settings, select Auto-fill services, and enable the Draw-Over option.
Additionally, go to your phone’s Accessibility settings, scroll down to Downloaded Services, and allow Bitwarden to detect and read input fields on your phone’s screen.

Enable All the Auto-Fill Options
Launch the Bitwarden app, tap Settings, and make sure all the Auto-fill services are enabled.

Don’t forget to update the app, restart your phone and check if the issue is gone.
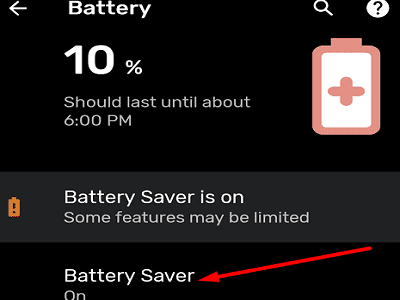
Disable Battery Saver
The battery saver may automatically close Bitwarden and other apps to extend your phone’s battery life. Go to your Battery optimization settings, disable the battery saver and check if the auto-fill feature is working now.
Conclusion
If Bitwarden’s Auto-fill function is not working, make sure the feature is enabled. On Android, disable the Battery Saver and make sure the app can show a pop-up on top of other active apps. Did you manage to fix the problem? Hit the comments below and tell us which solution worked for you.


Have had similar issues and would not recommend BW to anyone who didin’t have a good level of computer expertise. Last pass has the security problems, but used it for over a year with no such problems!!
almost all my vault entries will not autofill when I click the option i get message ‘bitwarden cannot autofill copy username and password instead’
it has been like this for 4 years
No auto fill still doesn’t work. It was working and I haven’t changed anything.
the only thing happened is that a few days ago Bitwarden stopped working and I had to unload it clear cache and re install extension. Since the auto fill won’t work and it is checked off under options. Using Brave browser.